How to Delete An Album From Facebook
By
Herman Syah
—
Sunday, December 15, 2019
—
Delete Facebook Album

NB: Once you erase photos on Facebook, they can not be recouped. Conserve your photos somewhere prior to you remove. In case you require them in future.
How To Delete An Album From Facebook
1. Log in with your Facebook account. After that see your Timeline page.
2. Select the Photos tab

3. Click Albums to check out all your Facebook photo albums. The variety of pictures in an album is presented listed below the name of the album.

Click one of the albums to open it
4. Click the Gear icon

5. As well as choose Delete Album from the drop-down menu to delete the whole album.
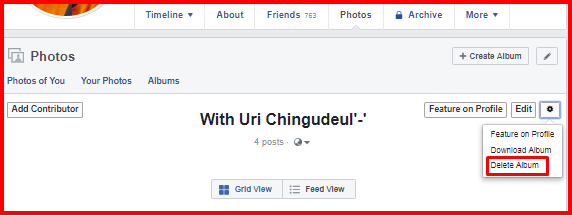
Erasing an album erases all its photos completely; removed albums can not be recouped. Confirm by clicking the Delete Album button or terminate by clicking Terminate.
Pictures in the 'Pictures of You' section are mainly photos that you have actually been identified in by your pals as well as various other Facebook users. You can not delete these images since you did not upload them. To make them vanish from your account, un-tag on your own from that picture.